

Halloween Framed Cling Vinyl Art DIY
HALLOWEEN HOME DECOR | LEARN TO MAKE YOUR OWN FRAMED ART USING CLING VINYL | BY MARITZAGARCIA.WEBSITE
This blog post is a collaboration with Grafix Arts who also provided me with all the Grafix Brand materials I used for this project. This blog post also contains hyperlinks to Grafix Arts products and/or links to some of the other products I used to create this project. Note: I don’t get compensated via Grafix nor any other company if you purchase any of the materials listed. I add links to help make finding the project products easier for you to find if you are interested. I only recommend products I trust and use for my projects. You will not be redirected to any other website(s) unless you choose to click on the links provided.
I'm excited to be sharing another easy Halloween DIY with you today. Can you believe Halloween is only a few days away?! If you haven't had a chance to put up any spooky season home décor or simply want something a little more minimal this year? Well, look no further. I have just the project —let's get started!

MATERIALS NEEDED:
Grafix Cling Vinyl
Grafix Chipboard
Scraper
Picture Frames
Transfer Paper (optional) we didn’t use it
Cutting Machine or cut designs by hand
PROJECT TIME: 30 MINUTES
INSTRUCTIONS:
STEP 1. DECIDE on a DESIGN TO DISPLAY ON YOUR FRAME(S). WHEN THAT PART IS FIGURED OUT. TAKE A SHEET OF GRAFIX CLING VINYL AND PLACE IT ONTO A CUTTING MAT AND CUT OUT YOUR DESIGn, OR FREE HAND YOUR VERY OWN DESIGN BY HAND.

NOTE: the sizes we used for our FRAMED VINYL ART are. Spiderweb 8.650” h x 11.151” w / Spider 4.075” h x 1.977” w / Trick 2.146” h x 7.311” w / Or 0.946” h x 1.610” w / Treat 1.949” h x 7.427” w.

STEP 2. ONCE ALL YOUR PIECES ARE CUT-OUT. PERP YOUR GLASS FRAMES BY WIPING THE GLASS CLEAN ON BOTH SIDES. WE USED WATER.

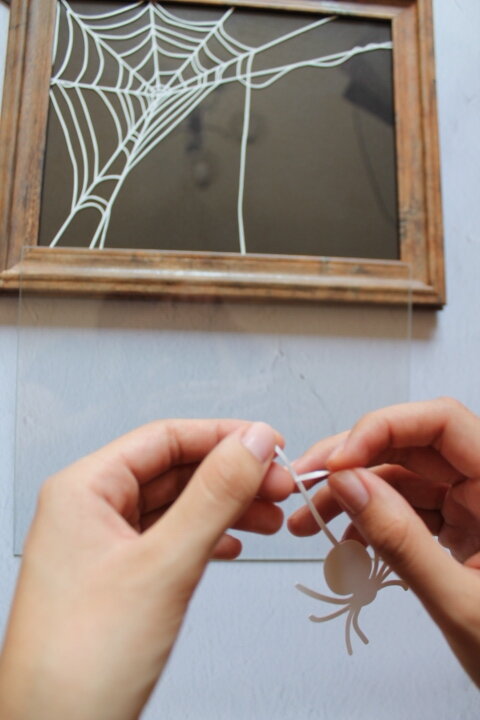
STEP 3. SLOWLY PEEL AWAY CLING VINYL FROM BACKING WHILE PLACING YOUR DESIGN DIRECTLY ONTO THE GLASS. OUR CLING VINYL GOT A LITTLE TANGLED, BUT DON’T WORRY. IT EASILY UNTANGLES AND IS QUITE EASY TO WORK WITH. THIS WAS OUR FIRST TIME USING CLING VINYL -AND WE LOVED IT!


STEP 4. TAKE A SCRAPER AND REMOVE ANY TRAPPED BUBBLES BY PRESSING DOWN ON CLING VINYL UNTIL SMOOTH.


STEP 5. TAKE A PIECE OF BLACK GRAFIX CHIPBOARD AND PLACE ONTO BACK OF GLASS. FINISH BY FULLY ASSEMBLING BACKING BOARD SECURELY. CONTINUE REPEATING All THE STEPS UNTIL ALL YOUR FRAMES ARE COMPLETEd —AND DONE!


This is what a few simple Crafting SuPPLIES can do to transfrom your home. Let me know what you think in the comment section below. HappY Halloween!

AS ALWAYS. I HOPE YOU GIVE THIS DIY A TRY. AND DON'T FORGET. IF YOU'RE ON INSTAGRAM AND RECREATE ANY OF MY DIY'S MAKE SURE TO TAG ME #KNOTJUSTPAPERDIY I ABSOLUTELY LOVE SEEING MY PROJECTS RECREATED. UNTIL NEXT TIME — HAPPY CRAFTING!
- Maritza.

